Adding an interactive map to your website with Google Maps is cool. Doing it in a stylish way is even more cool! This is where Snazzy Maps jumps in. It's a free online service that you can create customized Google Maps. There are tons of ready-to-use styles already, so if you wish, you can just pick one that fits your branding and move on.
But how are you going to handle this with HubSpot? The answer is, you must use a HubSpot theme which includes a map module and supports Snazzy Maps. Luckily, all of the HubSpot themes created by Stuff & Matters have this ability.
In this article, we're going to talk about the usage of the Map module in those HubSpot themes: Focus and Focus Plus. Focus theme for HubSpot is FREE to use by the way. Just login your HubSpot account and install it for free. When we're finished, you'll have an awesome map in your website like in the preview image below:
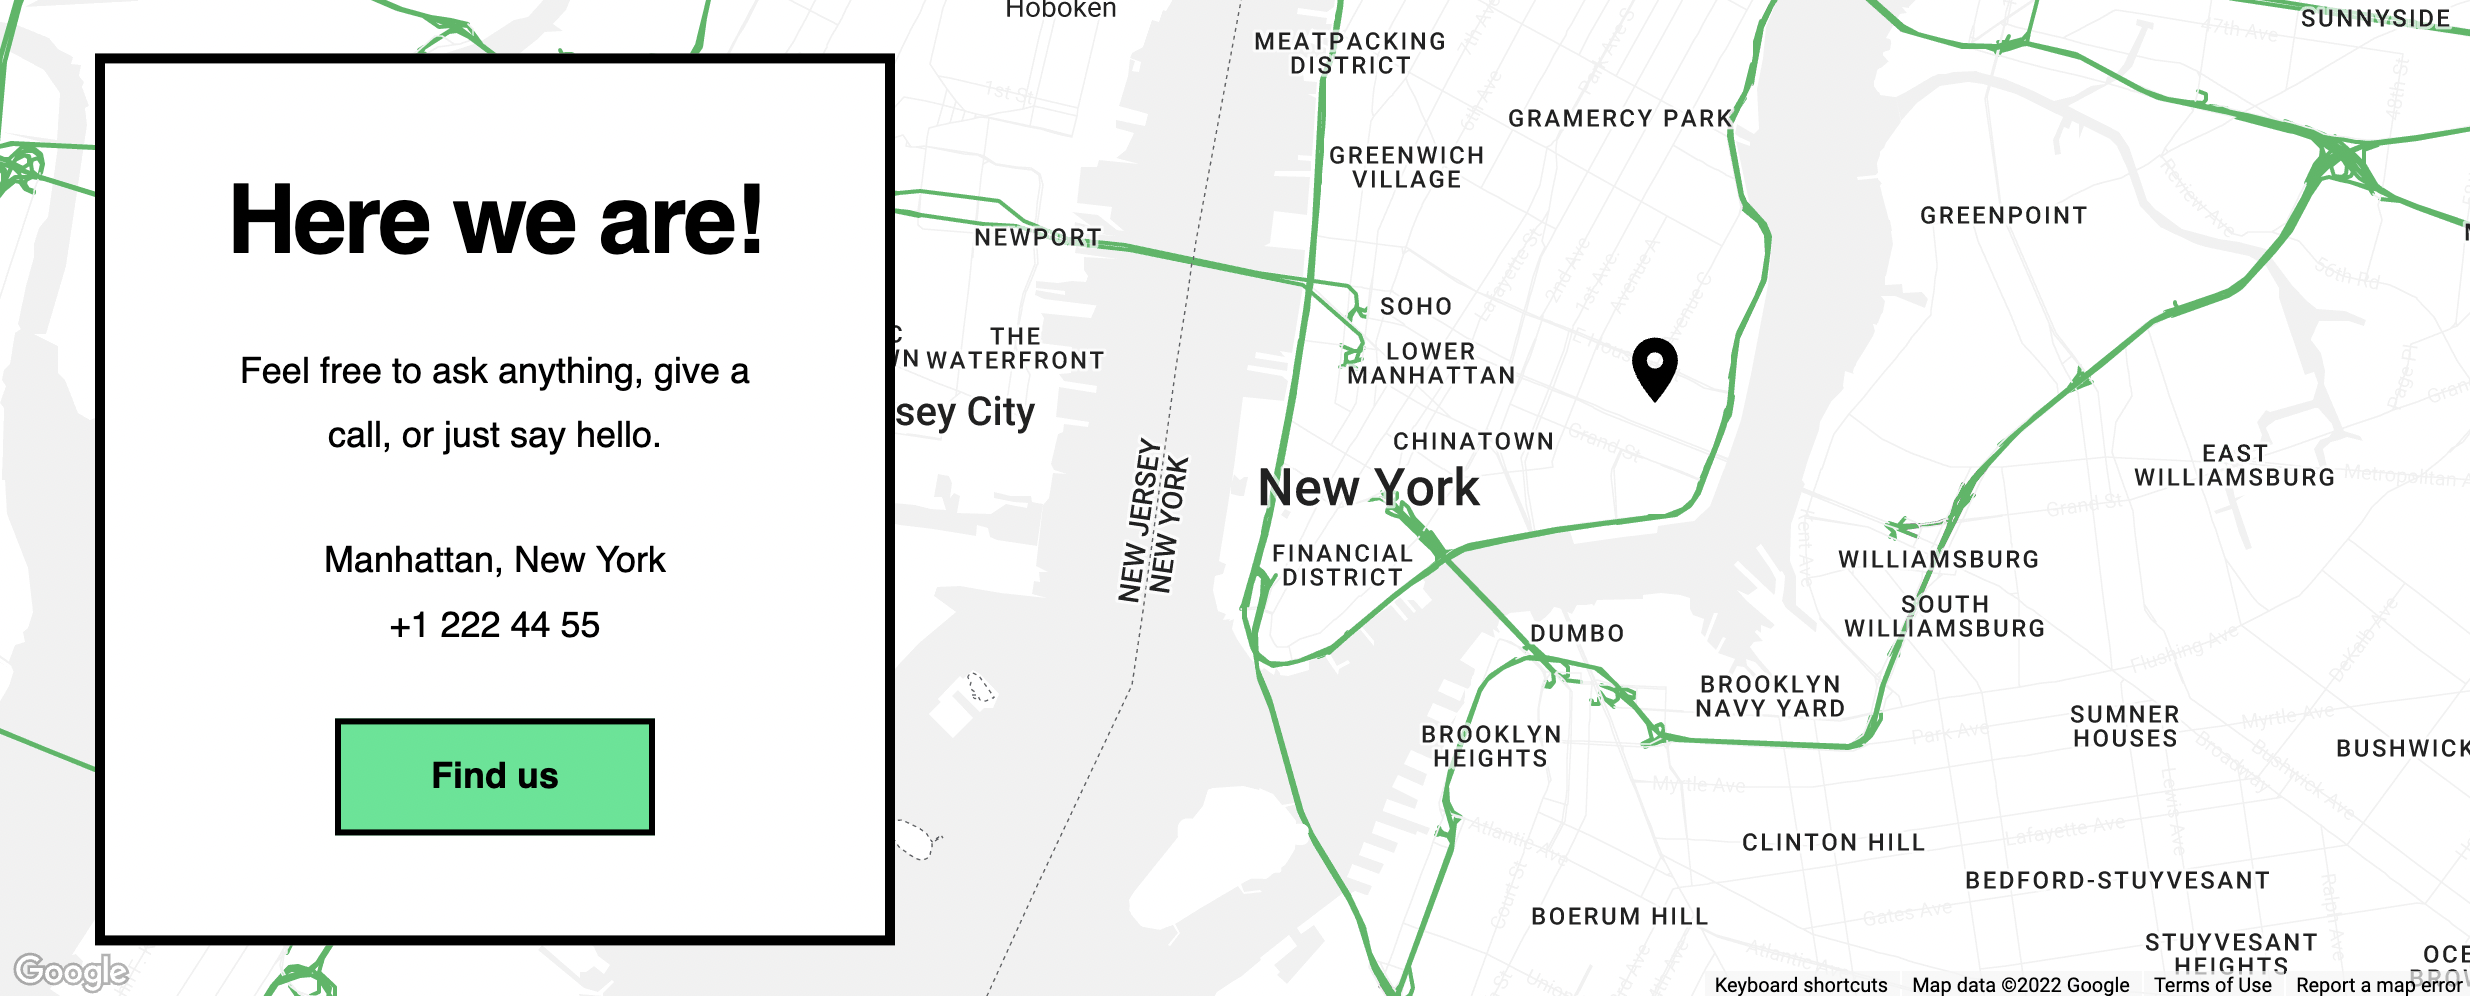
We'll handle this in 3 steps. First we'll get our Google Maps API Key, then we'll create our map with Snazzy Maps and finally we'll add this map into the Map module in our HubSpot theme. So let's get started!
Get your Google Maps API Key
Google requires a key to let us use the map service. Here's how to get your API key:
- Visit this page: https://developers.google.com/maps/documentation/javascript/get-api-key
- Scroll down a bit and click the Go to the Credentials page button.
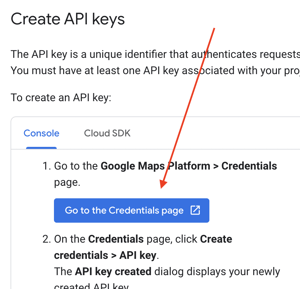
- Now, if you're able to see the CREATE CREDENTIALS button, just click it. If you don't see that button yet, please select a project first and then you'll realize the button.

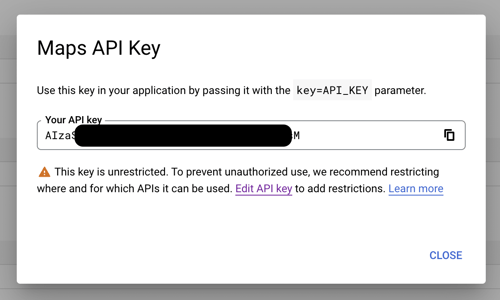
IMPORTANT NOTE: Google requires a billing account in order to use the map service. You can find more info on this page: https://console.cloud.google.com/billing - Once you're OK creating your credentials, you'll see a pop-up window that includes your API key. We'll need this key later.
- It's important to attach the Google Maps service to your API key to ensure that your map will be displayed on your website. To do this, please navigate to APIs & Services > Enabled APIs & services page.
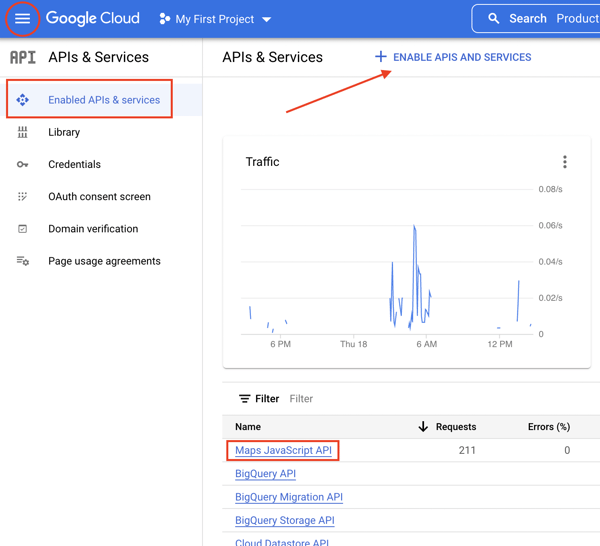
On this page, if you're seeing the Maps JavaScript API name in the list, you don't need to do anything. Otherwise, please click the ENABLE APIS AND SERVICES button and choose Maps Javascript API on the upcoming page.
You can also watch the YouTube video by Google below to learn more about generating your API key:
Create your map with Snazzy Maps
Here's how to create your Google Map with Snazzy Maps:
- Go to https://snazzymaps.com/account/register and register easily.
- Then visit https://snazzymaps.com/build-a-map and start creating your Google Map by selecting a style, size & location and an optional marker. We suggest you to keep the default map size (100% width - 600px height).
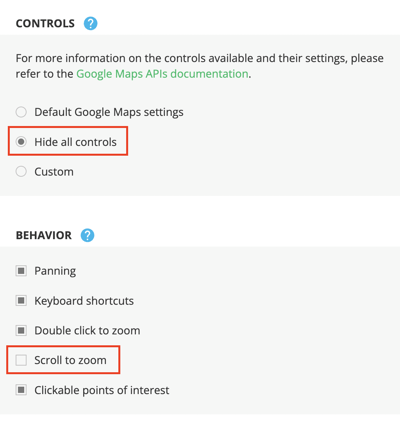
- In the ADVANCED SETTINGS section, we recommend you to select Hide all controls and uncheck Scroll to zoom options.
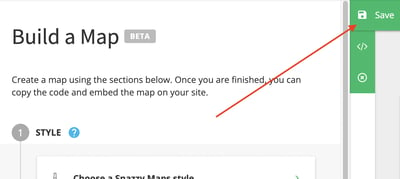
- When you're done with your styling, click the Save button.
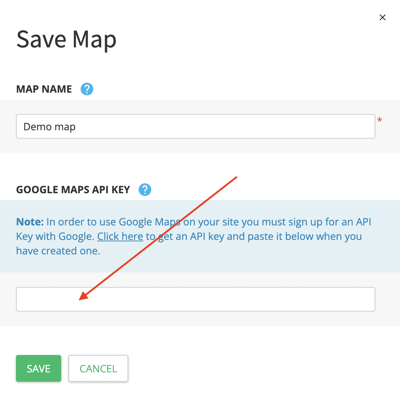
- In the upcoming window, you'll see a field that asking for a Google Maps API Key. Remember the key we got from Google? Copy & paste that key into this field. Don't forget to give your map a name too. And then hit Save.
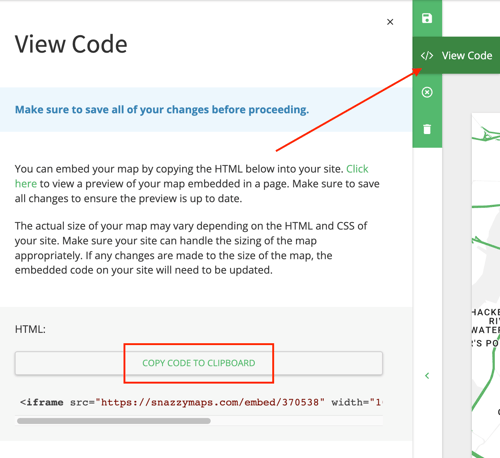
- Finally, after saving your map on Snazzy Maps, you'll see a code starts with "<iframe src…". If you're not seeing it, please click the View Code button. Copy that code and we'll use it in a moment.
Add your Snazzy Map code into the Map module
We're at the final step! All we have to do now is adding a Map module to our page and then insert the Snazzy Maps code into the related field in the module. Here's how:
- In your HubSpot account, navigate to Marketing > Website > Website Pages and click the Edit button of the page that you want to add the map onto. Or, just create a new page by clicking the orange Create button at the top right of the screen.
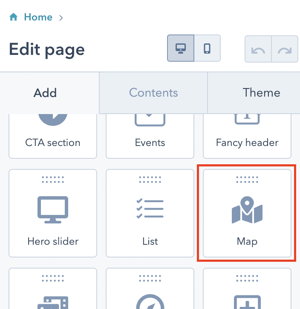
- Drag & drop the Map module onto your page.
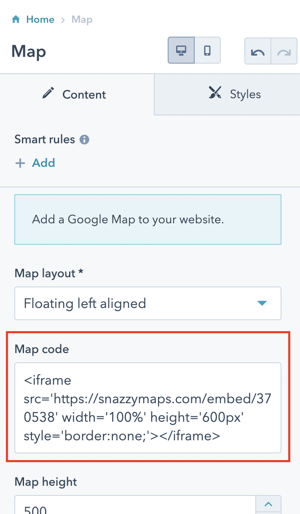
- Paste the Snazzy Maps code you got into the Map code field and you're done!
Congratulations! If you followed all of the steps correctly, you should be seeing your lovely map on your website now. We know, it’s a bit tricky to create a Maps API key especially, but for now, Google wants us to do it in this way. Hopefully they will provide an easier solution to use the map service!
Need help?
Don't hesitate to use the comments section below for your questions!
Comments